
A Camera Archive is a complete back up of the contents of a videotape (for tape-based cameras), or a memory card or hard drive (for file-based cameras). Normally the video in a camera archive is only accessible from within Final Cut Pro, but what if you need to use some of the archived video in another editing program? You could import the needed video into Final Cut Pro and then export it from a project, but that is quite a bit of work. With a bit of care video from a camera archive can be made available to be imported directly into other software, and this tutorial will show you how.
1. In the Finder, open the hard drive where your Final Cut Pro camera archives are saved and navigate to the Final Cut Pro Camera Archives folder.
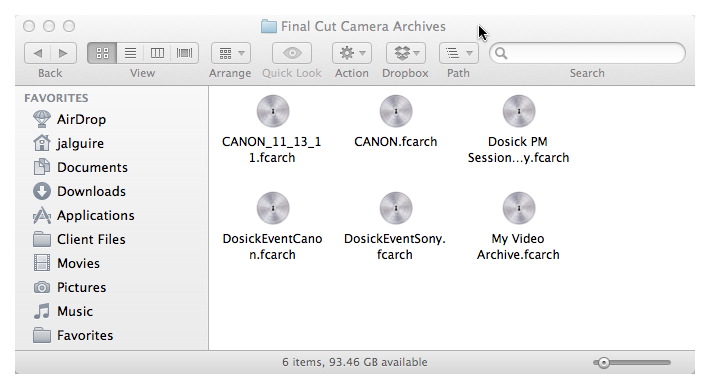
The Final Cut Pro Camera Archives folder is where your camera archives are saved and can be found on any hard drive where Final Cut Pro Events and Project folders are located. The Camera Archive icon looks like a silver disk with a keyhole in the center, and the filenames end with the .fcarch extension.
NOTE: The first time you use this technique, you will probably want to perform it using a duplicate of an existing Camera Archive to avoid making it unusable later. You will also want to be sure to have a backup of your Camera Archives.
1. In the Final Cut Pro Camera Archive Folder click to select the desired Camera Archive and then from the Menubar select File>Duplicate, or press the Command-D keys.
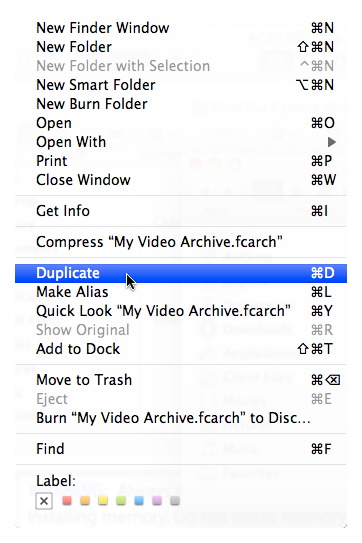
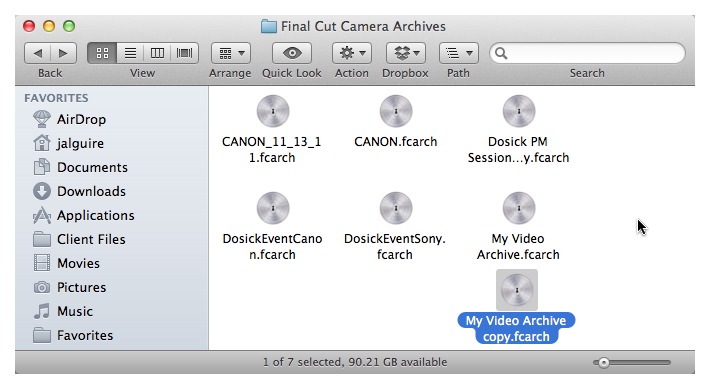
This Duplicates the selected Camera Archive.
1. In the Final Cut Pro Camera Archive Folder, Right or Control-click on the duplicate Camera Archive and select Show Package contents.
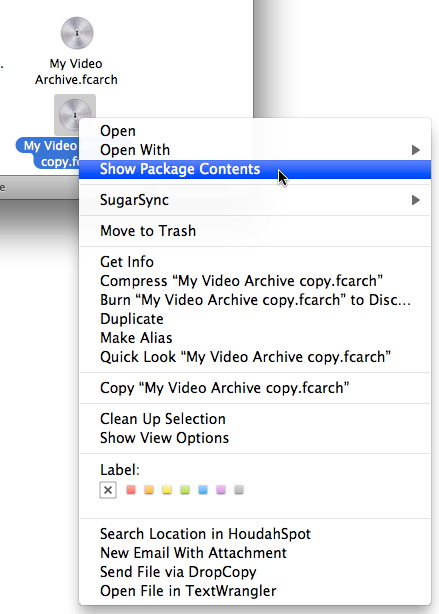
This will display the contents of the Camera Archive. Camera Archives are stored in a special kind of folder in Mac OS X called a package. If you try to open the Camera Archive by double-clicking Final Cut Pro will be launched instead.
The contents of this example Camera Archive include a ACHD folder, which contains the video files, a DCIM folder which holds still images taken by the camera, a MY_Music folder that has music files that were included on the camera’s media card, and a FCArchMetadata.plist XML file that stores Camera Archive metadata.
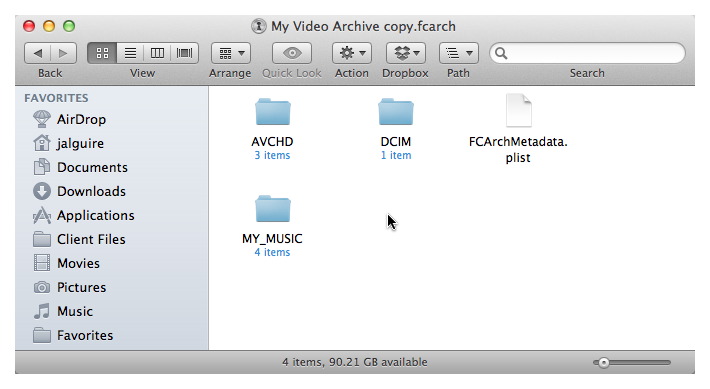
For this tutorial we will be concerned primarily with the AVCHD folder. It is necessary to move the AVCHD folder out of the Camera Archive Bundle in order for other video programs to access it.
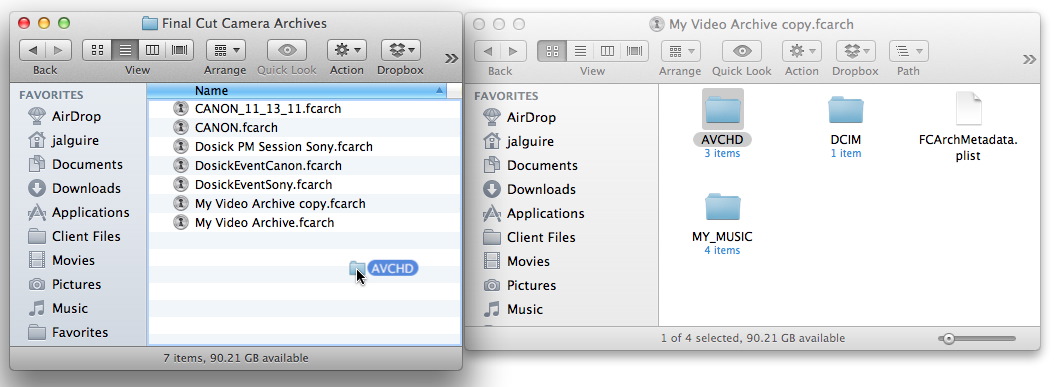
1. In the Finder, open a new Finder window by pressing the Command-N keys on the keyboard.
A second window makes it easier to move the AVCHD folder.
2. Move the new window adjacent to the My Video Archive copy window. In the new window, navigate to the Final Cut Pro Camera Archive Folder.

In the My Video Archive copy window, click and drag the AVCHD folder to the Final Cut Pro Camera Archive window.

That’s all you need to do. Now the archived video is accessible to any program you want to use to import and tweak it. Just launch your application, and in its import function navigate to the AVCHD folder and take it from there.
NOTE: Since we have duplicated the Camera Archive in this case, once we are done with the video you can delete the AVCHD folder and the duplicate Camera Archive. If you don’t duplicate the Camera Archive, and you might not want to as the archives can be pretty large, then you will want to drag the AVCHD folder back into the original Camara Archive folder so that Final Cut Pro can continue to use it.